

VS Code Extension
Manage issues and change requests from inside the editor
The CollabOps extension for VS Code lets you browse and manage issues, change requests, projects, and documents without leaving the editor.
It also works in Cursor, which is based on VS Code.
1. Installation
Install from the Marketplace
The extension page is at marketplace.visualstudio.com/items?itemName=collabops.collabops.
Select the Extensions icon in the activity bar.
Type CollabOps in the search box.
Select CollabOps in the results and click Install.
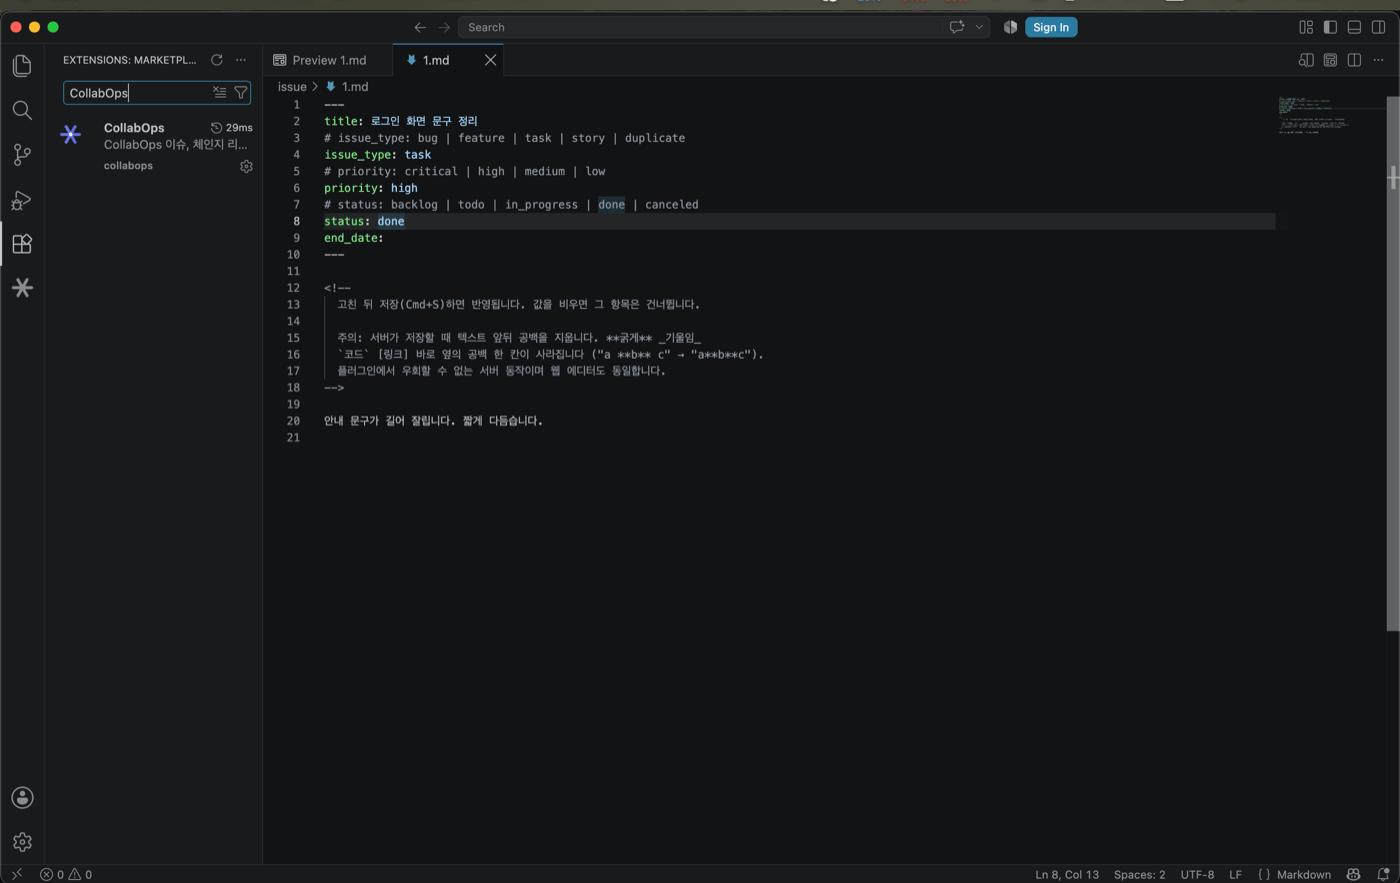
When installation finishes, the CollabOps icon appears in the activity bar.
Install from the command line
code --install-extension collabops.collabopsFor Cursor:
cursor --install-extension collabops.collabopsVS Code 1.90 or later is required.
2. Signing in
You sign in from the extension itself. No prior setup is required.
Select the CollabOps icon in the activity bar.
Select Sign in.
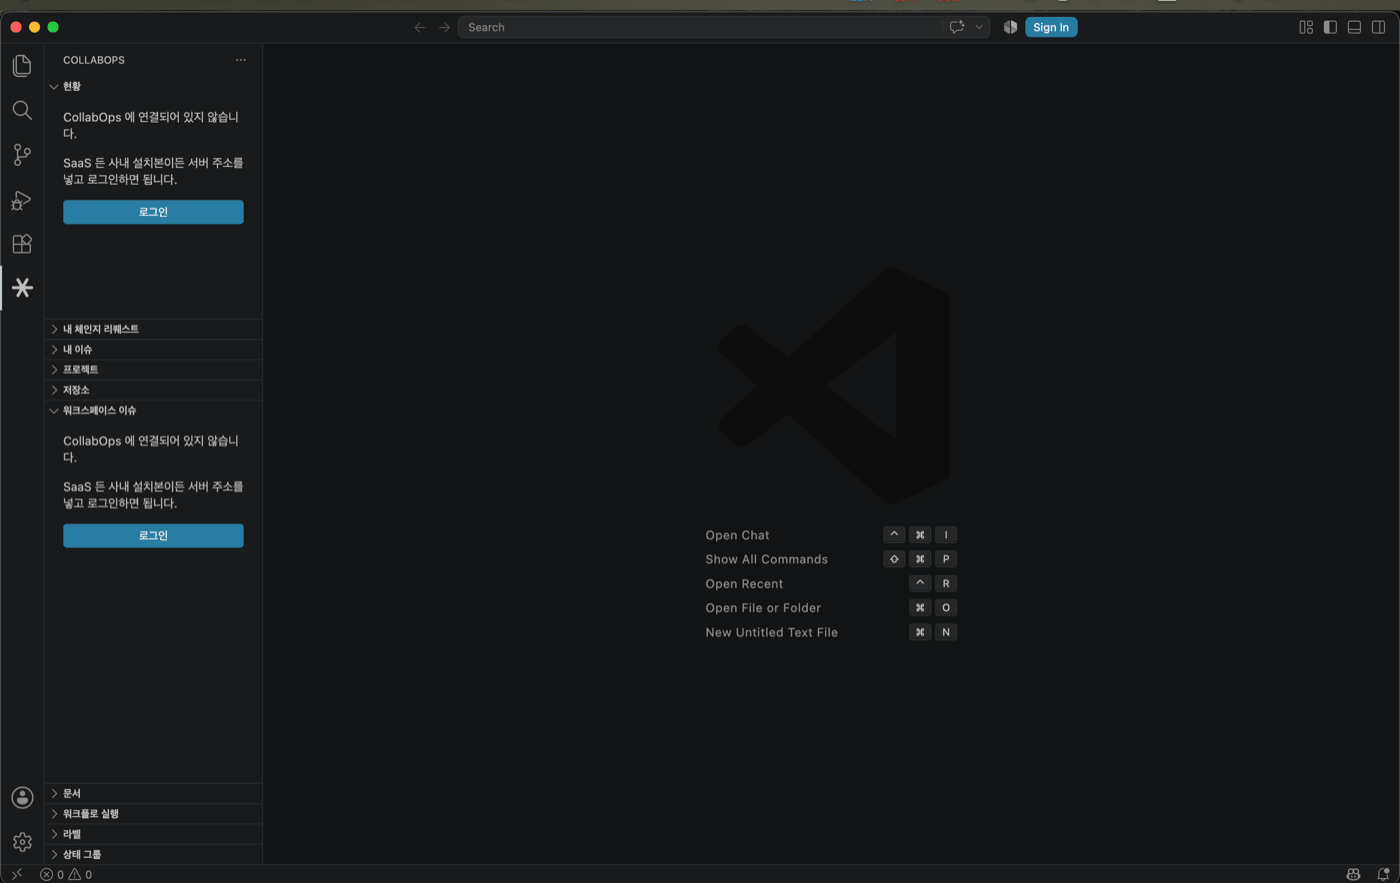
Enter the server address.
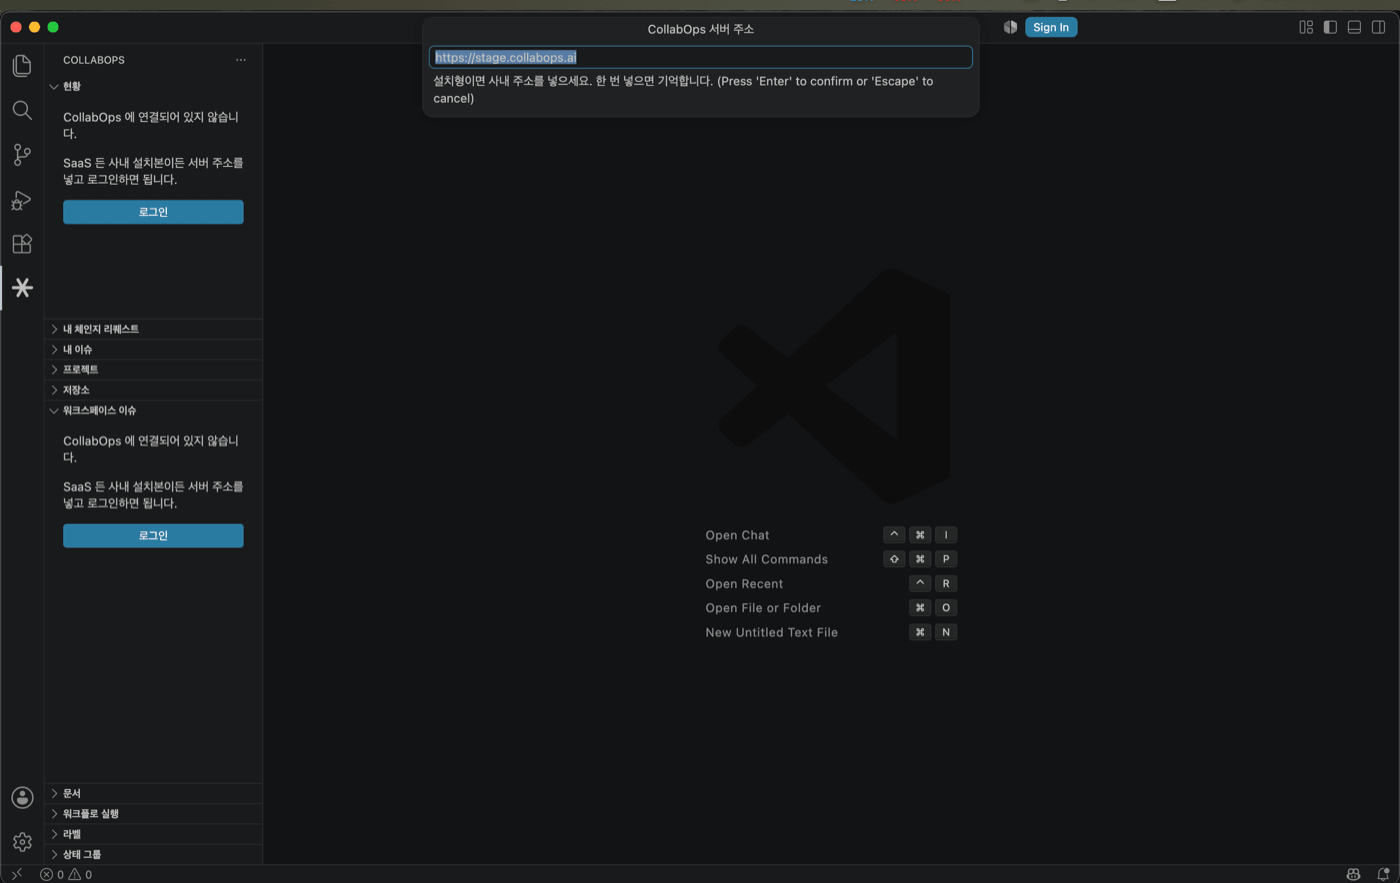
Enter your email and password.
Select a workspace.
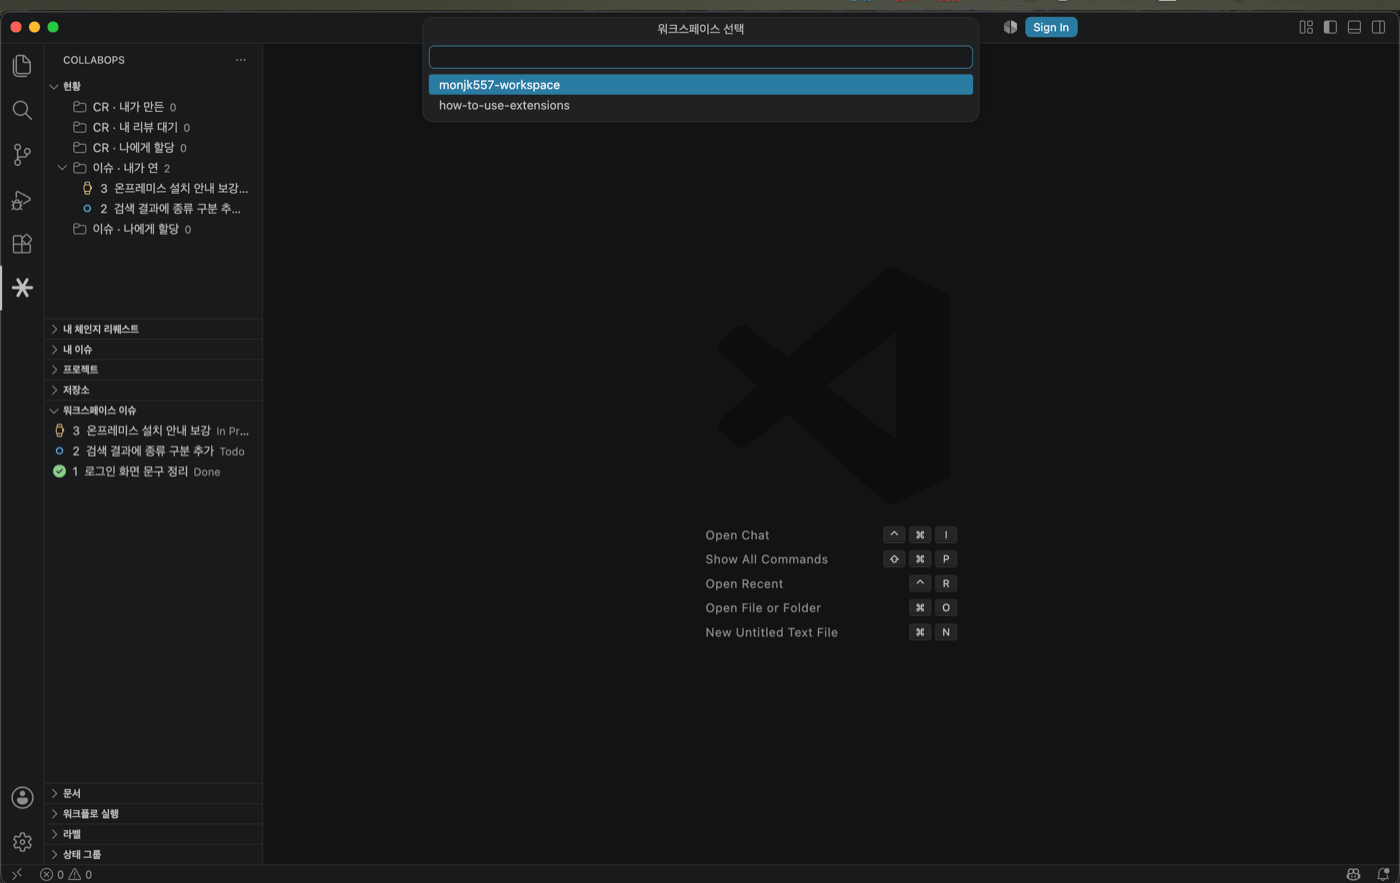
| Field | Description |
|---|---|
| Server address | Use the default for SaaS. For on-premises installations, enter your server address. |
| Your CollabOps account email | |
| Password | Your CollabOps account password |
| Workspace | Selected automatically if you have access to only one workspace. |
The server address, email, and workspace are saved, so you do not need to enter them again. If your session expires, only the password is requested.
3. Interface
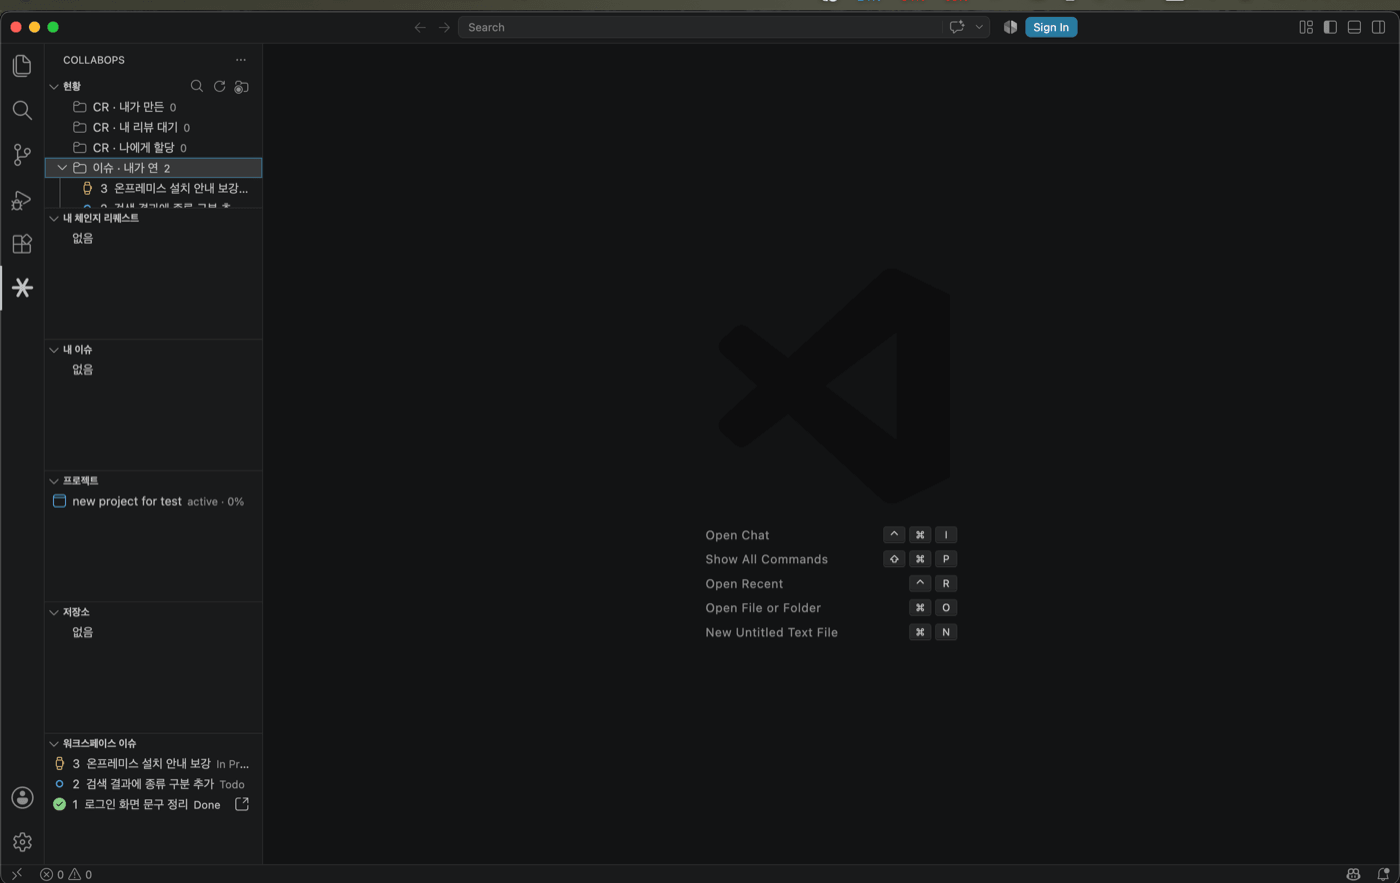
Selecting the CollabOps icon in the activity bar shows the following lists in the sidebar.
| List | Contents |
|---|---|
| Status | Change requests you created, change requests awaiting your review, and issues assigned to you, grouped by role. |
| My Change Requests | Change requests you created |
| My Issues | Issues assigned to you |
| Workspace Issues | All issues in the workspace |
| Projects | Projects in the workspace |
| Repositories | Repositories in the workspace |
| Docs | Documents in the workspace |
| Workflow Runs | Recent pipeline runs |
| Labels | Workspace labels |
| Status Groups | Issue status group settings |
Item status is indicated by icons. Issues are shown by progress stage; change requests are shown by merged, closed, draft, or conflicting state.
4. Browsing
Details
Selecting an item opens its details in Markdown. Change request details include the description, linked issues, CI results, and activity history.
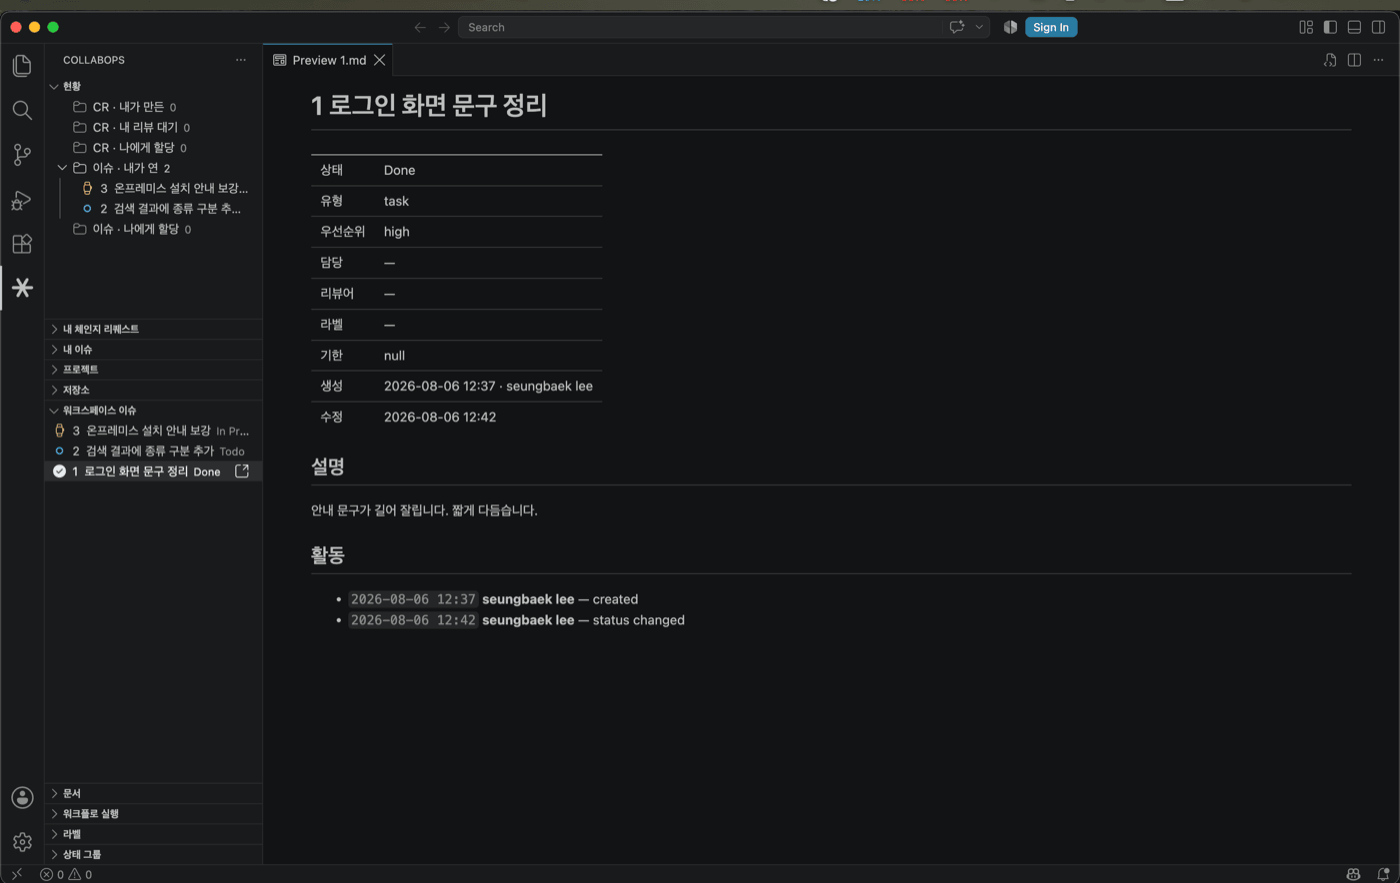
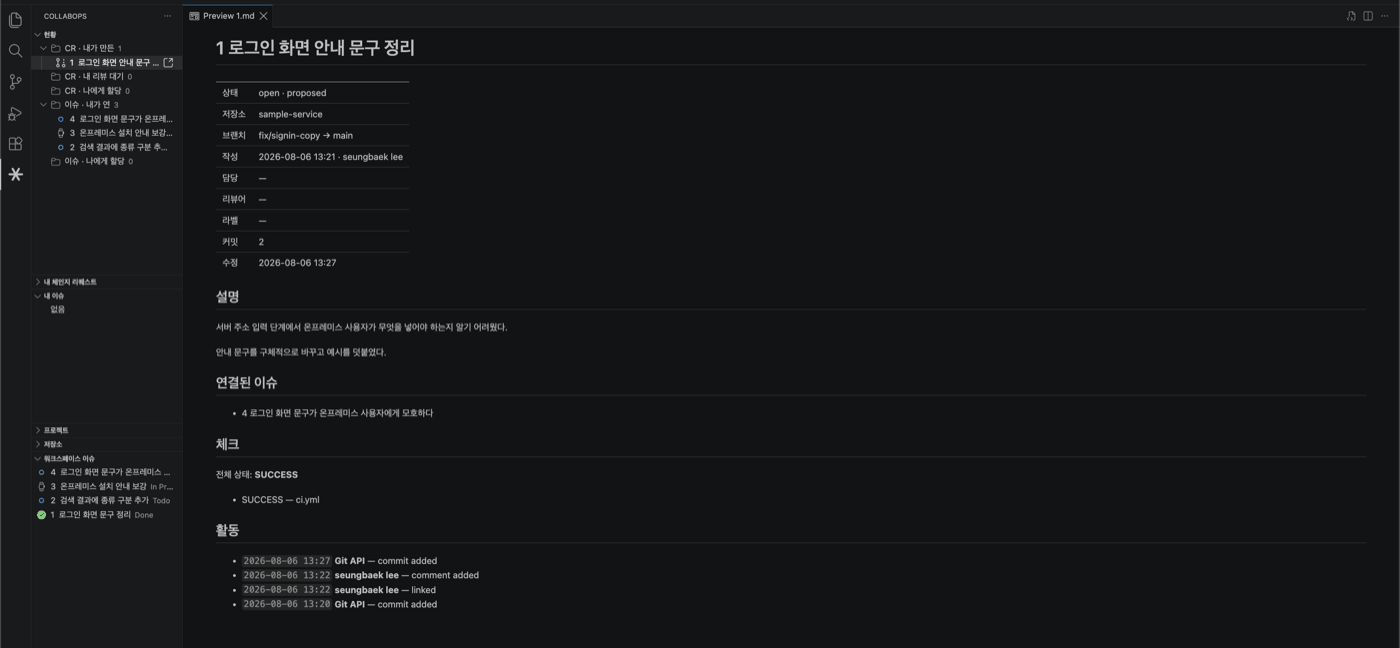
To open an item in the browser, select the link icon on the right of the item.
Search
Search issues, change requests, documents, projects, and repositories at once.
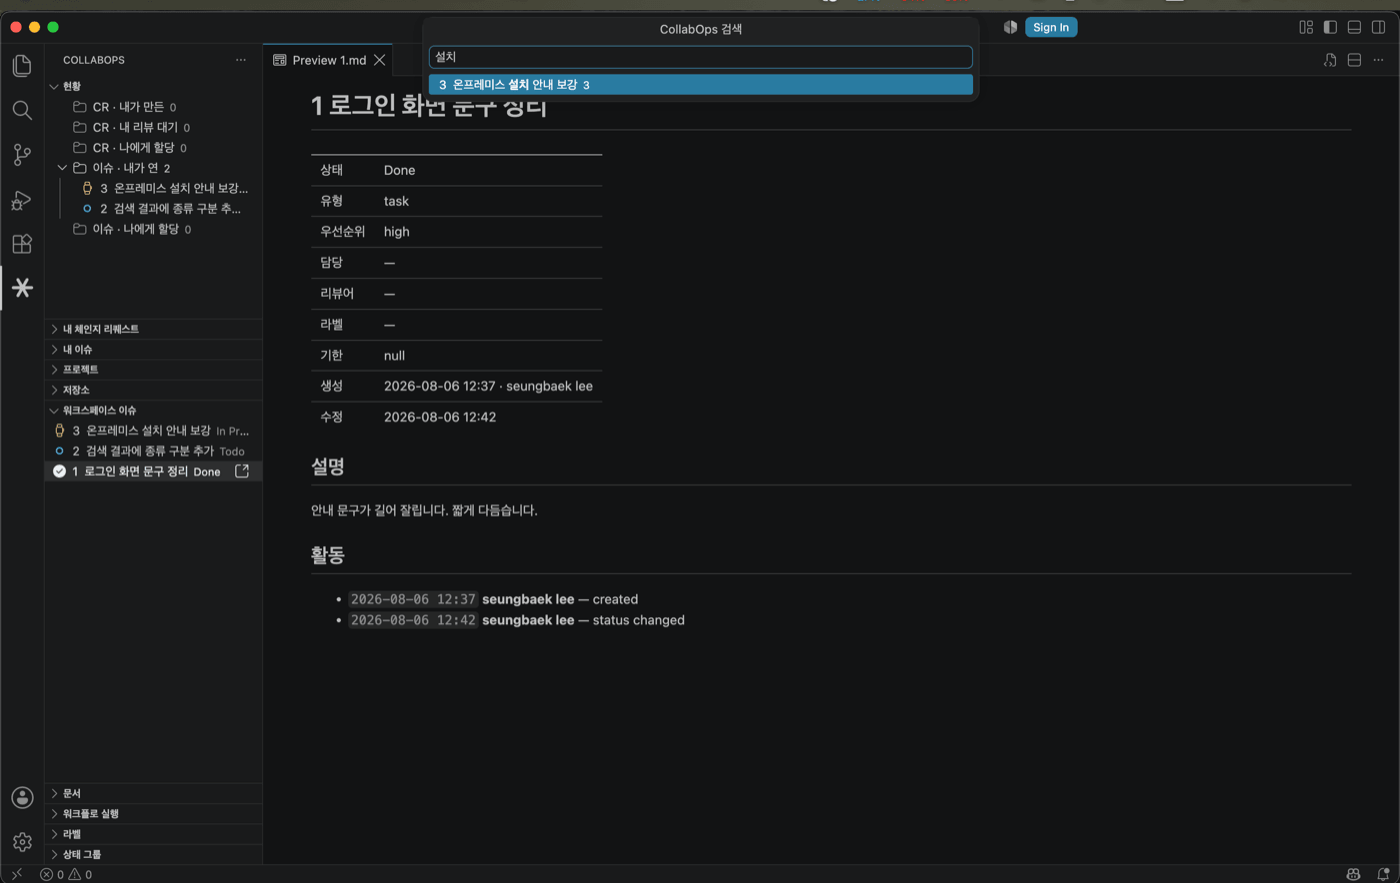
| OS | Shortcut |
|---|---|
| macOS | Cmd + Alt + P |
| Windows and Linux | Ctrl + Alt + P |
You can also run CollabOps: Search from the command palette.
5. Editing
Right-click an item and select Edit to open an edit buffer.
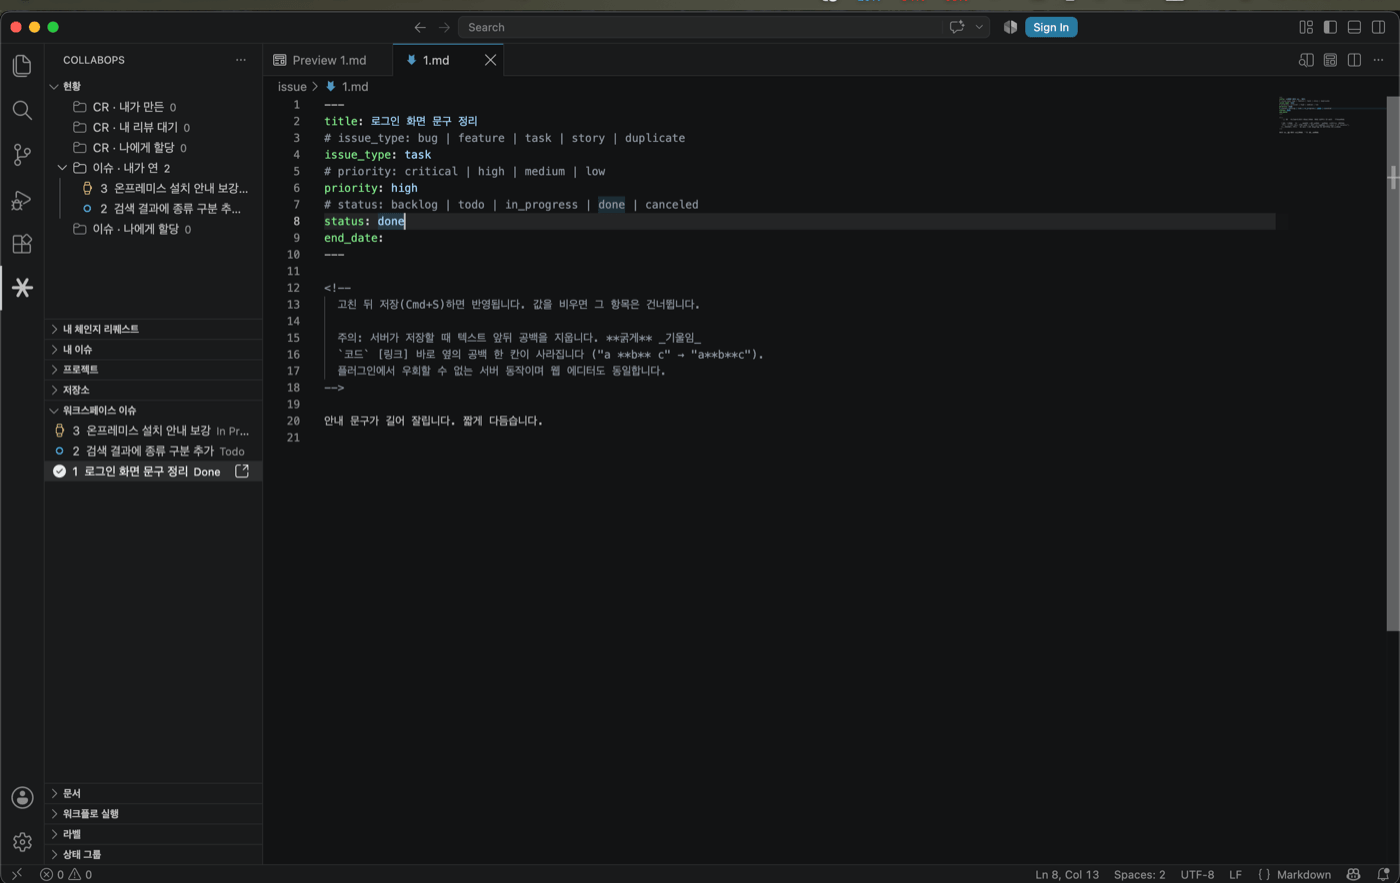
---
title: Improve the sign-in screen
status: in_progress
priority: high
end_date: 2026-08-20
---

Write the body in Markdown.

- Lists
- Tables
- Code blocks
Edit the title, status, priority, and due date in the upper section, and the body below. Saving applies only the fields you changed.
6. Actions
Right-clicking an item shows the actions available for that item type.
| Target | Available actions |
|---|---|
| Issue | Create, close, reopen, comment, link issues, sub-issues, link documents |
| Change request | Create, review, merge, toggle draft, comment, link issues, link documents |
| Document | Create, edit body, restore version, comment |
| Project | Create, manage members, teams, and milestones |
| Workflow run | Cancel, re-run, view logs |
Every action that modifies data requires input or confirmation.
7. Git integration
The following operations are available from the editor.
Create a topic branch from an issue
Check out the source branch of a change request
View the diff of a change request
Update a change request branch with its target branch
Clone a repository
Git commands are sent to the integrated terminal. Commands that modify the working tree are typed into the terminal but not executed, so you decide whether to run them.
8. Commands
Type CollabOps in the command palette to see the available commands.
| Command | Description |
|---|---|
| CollabOps: Sign in | Connect to a server and authenticate |
| CollabOps: Sign out | Delete the saved session |
| CollabOps: Select workspace | Switch workspace |
| CollabOps: Change server | Change the server address and sign in again |
| CollabOps: Search | Unified search |
| CollabOps: Refresh | Refresh all lists |
9. Notes
Whitespace when editing body text
The server removes leading and trailing whitespace from text when saving, so a space adjacent to bold, code, or link formatting may be dropped. The same behavior applies in the web editor.
Images
Images in the body are shown as identifiers and cannot be previewed in the editor. Attachments are preserved when you edit and save.
Not supported
Permanent deletion — use the web application.
Assigning users and labels
Remote development
In Remote SSH and Dev Container environments the extension runs on the remote host, so you must sign in separately in that environment.
10. Troubleshooting
| Symptom | What to check |
|---|---|
| Lists show an error | The session has likely expired. Run CollabOps: Sign in again. |
| Cannot connect in an on-premises environment | Verify the server address. If you use a private certificate, check the http.systemCertificates setting in VS Code. |
| Lists are empty | Verify that the correct workspace is selected. Use CollabOps: Select workspace to switch. |